Background
None of the Beta Marine control panels for the new engine will fit into the space where the old panel goes. Rather than find a new location for the panel, I decided to build my own. This would allow me to customize the layout and look, as well as put in different gauges and controls.
Since the Beta comes with a control panel, and you can’t order it without, I chose to order their “C” series panel to get most of the gauges I wanted. These Murphy gauges can display an analog value as well as triggering an alarm at a set value. These would be the building blocks for my new panel.
Gauges
With my battery charging configuration, the volt meter was not really useful, so I decided to replace it with a fuel gauge instead.
Switches
The Beta panel comes with a key switch that has positions for Heat, Off, Run, Start. It has a separate switch for the Stop solenoid. The key switch is very stiff, and my wife did not like how hard it was to turn, so I used a start switch from Catalina Direct that was easier to turn. The new switch has Off, Run, Start. I added a new push button switch for the glow plugs, and got one to match for the stop switch. I put a red cover on the stop switch, which makes it easier to find when bending down to turn off the engine. Both the stop and heat switches need to be robust, since they carry a fair bit of current when activated.
I then added a switch for the blowers. They don’t draw much power, so I was able to use a normal water-resistant toggle switch.
I also wanted to be able to disable the alarm buzzer on-demand. This would be helpful when doing maintenance or underway if there was an alarm that I couldn’t do anything about right away, but didn’t want to continually hear. To accomplish this, I added another toggle switch with a lockout cover for the power to the alarm module.
Alarms
Speaking of the alarm module, the one that comes with the panel was made to work with the volt meter, so I used the buzzer and built my own small PCB board to take the inputs from the gauges and run them through diodes to isolate them from each other. From there, they connect to the ground side of the buzzer. If any gauge triggers an alarm, it connects its alarm output to ground, completing the buzzer circuit.
As part of the cooling system, I added a water flow switch and an exhaust over-temp switch. I wired those to additional alarm lights on the new panel, as well as to the alarm buzzer module. I later removed the water flow connection to the buzzer, since there is not enough water flow at idle to turn it off. I left it on the alarm light so we could still see when it was on.
Fabrication
For the panel itself, I created a PDF with layers for the words and the cutouts, and took it to a local trophy shop where they fabricated it from two-layer material. I chose one with black writing on a stainless-steel-look finish. It was a bit thinner than I would like, but it seems to be OK with the support it gets from where it is mounted.
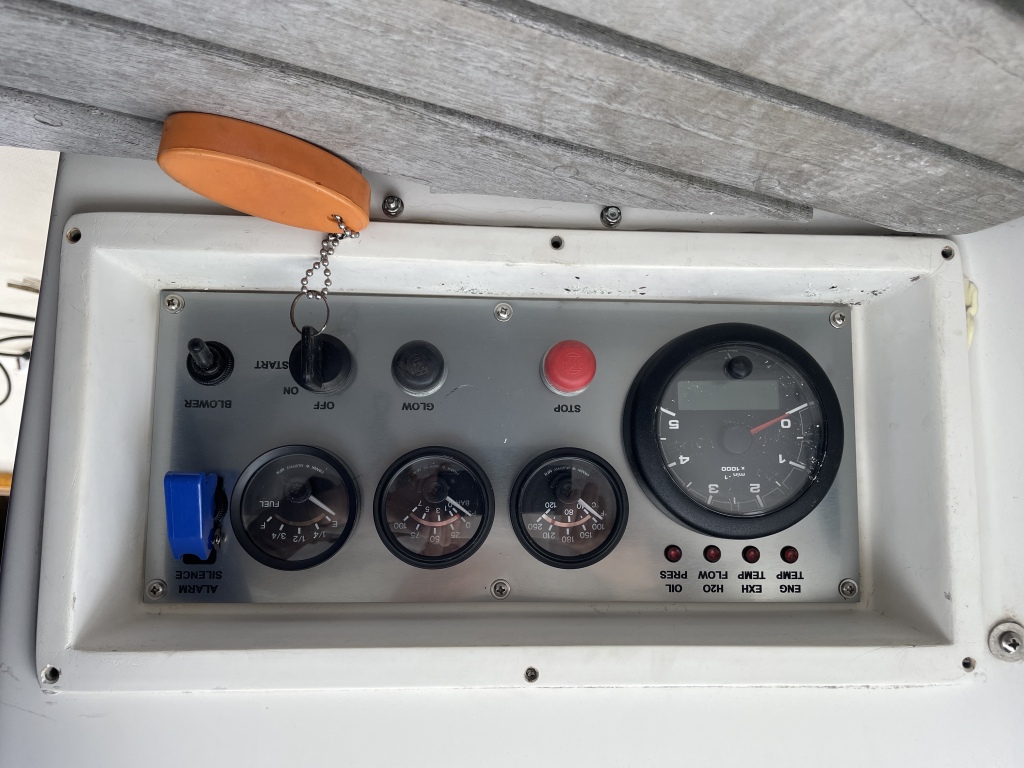
Here is the end result…
NEMA 2K Interface
Since the control panel is down near our feet, I wanted to be able to display the engine data on our navigation display. I looked at several option, including building my own from a Raspberry Pi. But in the end, I decided to buy the EMU-1 from Actisense.
I added an additional connector to the back of the panel with power, ground, and all of the gauge outputs. These then feed into the EMU-1 for publishing onto the N2K bus.
I configured a new screen on my B&G Triton 2 that includes Tach, Oil Pres, Eng Temp, and Fuel Level. I can easily switch between this screen and the one for sailing data.
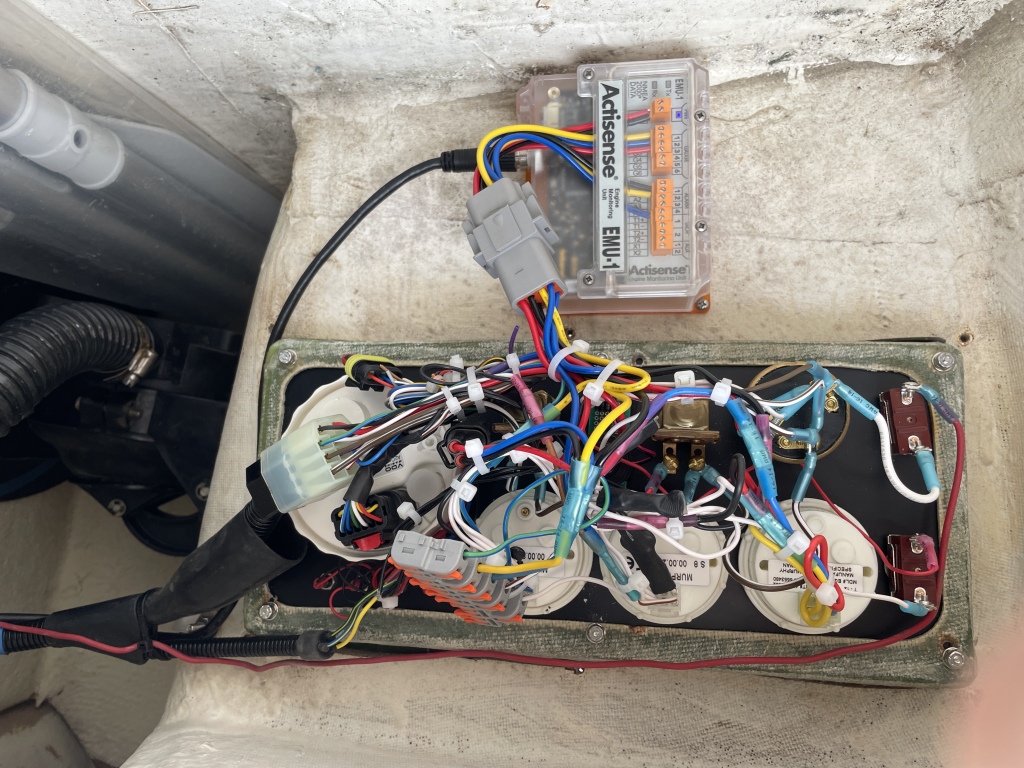
Here is the back of the panel with all the wiring. The EMU-1 is the orange box below the panel.


