Background
After working on the heat exchanger, the engine temperature continued to rise and over heat. I tried all the tricks for “burping” the system, but since I did not remove any fluid from the water heater loop, there should not have been any air pockets. In any case, nothing worked, so I decided to remove the thermostat and make sure there was water flowing through the system.
Turns out the bolts that held the thermostat housing in place were seized. One came out eventually, but the other sheared off. With some prying and twisting, I was able to break it off at the base and get the housing off. Then I used a bolt extractor to remove the remaining parts of the bolt in the water flange.
The thermostat itself also looked pretty corroded, so I suspected it as part of the overheating issue.
New Parts
Since the one bolt was pretty much corroded into the housing, I decided to buy a new housing. I found one at Catalina Direct with a second port for installing a temperature switch that can drive an alarm at the helm. This sounded like a very good idea, so I order the additional parts I needed for that. It came with the temp switch, but I also needed a new temperature sender for the gauge, since the old one was also badly corroded into the old housing. A new thermostat and buzzer rounded out the order from Catalina Direct.
Then I also needed new bolts and petcock, which they do not sell. I got the bolts (6mm x 50mm) and petcock from Amazon. I also order some fitting to replace the petcock with a ball valve and hose barb to make it easier to burp the system in the future. These worked out pretty well, so I will hang on to the petcock as a backup.
Testing
I put the old and new thermostats in a pan of water on the stove and brought them up to temperature. The old one did open, but only a little bit compared to the new one, so I was really hoping that was the issue.
New install
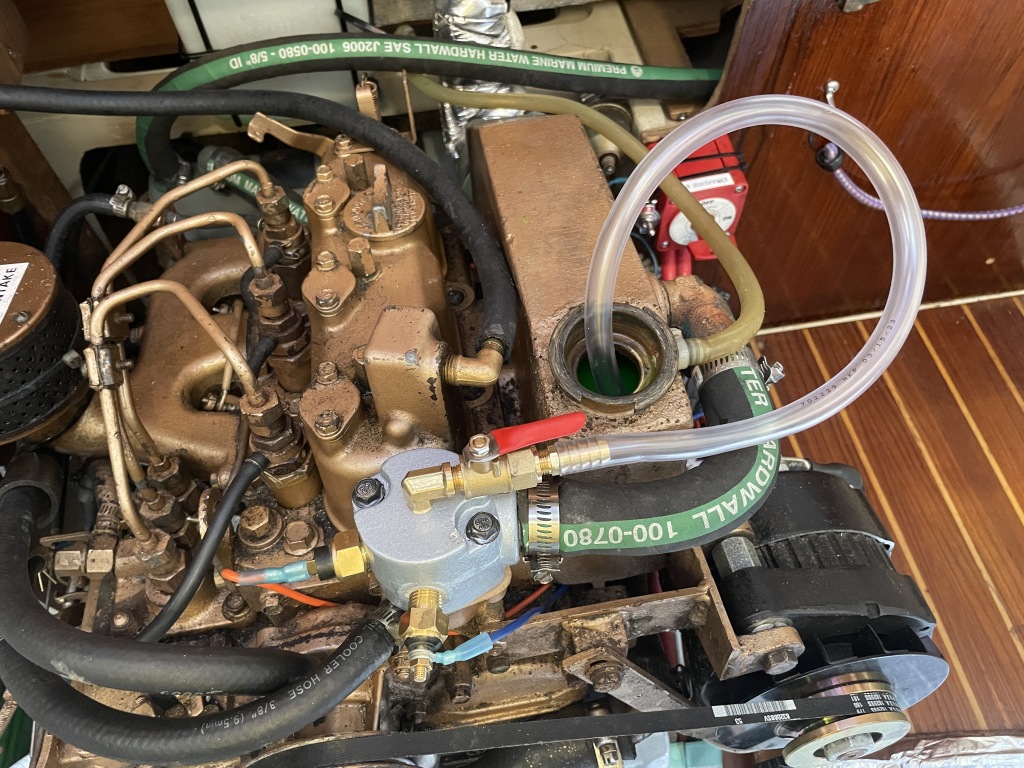
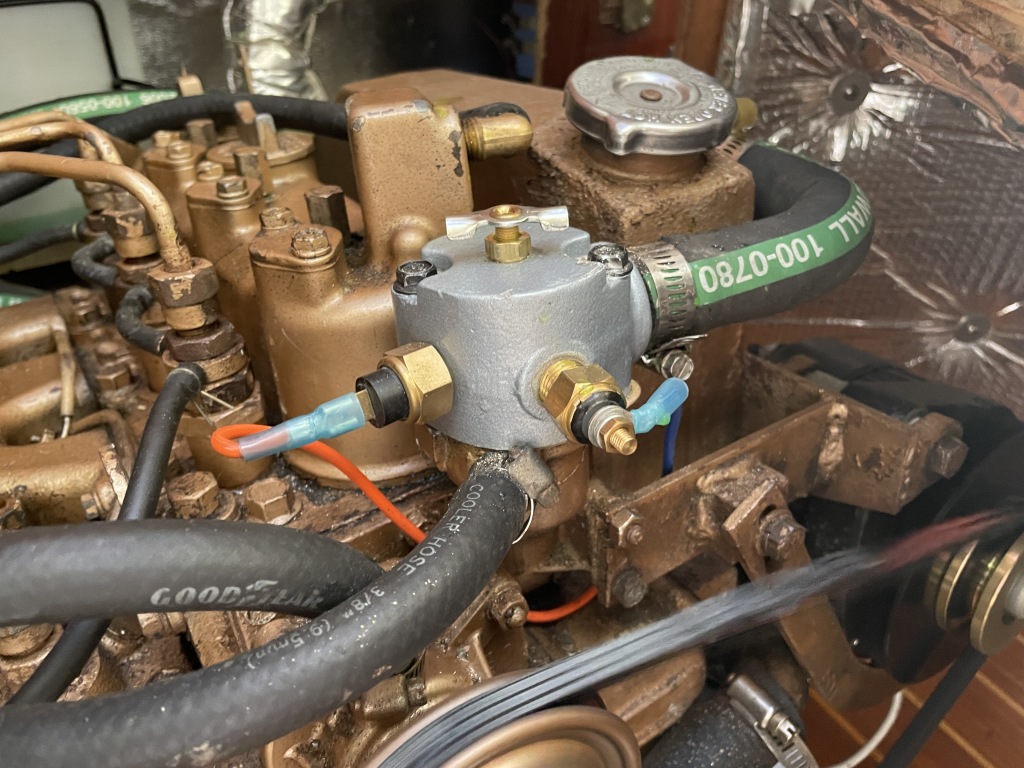
I screwed the two new senders into the housing, without any pipe compound or tape so they would get a solid ground via the housing, and ran new wires for both to the terminal block near the engine. I also added a 1/8″ elbow, ball valve and 3/8″ hose barb for bleeding the air out of the system. After cleaning up the surface and adding the new thermostat and gasket, I put some T-gel in the bolt holes and tightened it all down. I then reinstalled the hose from the thermostat to the reservoir.
Bleeding
Prior to installing the thermostat, I bled as much air as possible out of the system. I started by removing both heater hoses, and pouring some coolant into one. The other immediately overflowed, which meant that no air was trapped there. I then reinstalled those hoses and added fluid to the manifold slowly until I saw it start to fill up the thermostat housing.
After installing the thermostat, I opened the bleeding valve and added more fluid until it was about 1/2″ from the top of the reservoir. I added a short piece of 3/8″ tubing to the bleeding valve, and ran it to the reservoir.
Start Up
I left the cap off so the bleed tubing could vent into the top of the reservoir. Then I started the engine and made sure I had good water flow out the exhaust. Next I went below, and started monitoring the temperature at the thermostat housing using an infrared thermometer. It slowly rose to about 140 degrees and stayed there, so I put the transmission in gear and throttled up to about 1800 RPM. The temperature then climbed up to 160 and stayed there, suggesting that the thermostat was working. I let it run that way for about 10 minutes, and it never went above 160. I also checked the gauge, and it was also showing about 160, so the new sender seemed to be working well.
I shut it down, closed the bleed valve, removed the tubing, and put the cap back on the reservoir. To keep the valve from accidentally opening, I put a small hose clamp on it to hold it closed.
Update 7/29/23
While testing some other repairs, I noticed that I was leaking coolant from around the top of the thermostat housing where I installed the bleed valve. I decided to go back to the original setup with a petcock. It could be tightened better, had fewer parts to fail, and was lower profile so it did not snag on the engine housing insulation.


