With the new engine and transmission, the controls (throttle, shift, shutoff) had to be reworked, since they are different on the new engine. The shifter moves in the opposite direction, and the shutoff is now electric.
Shutoff
For the shutoff, I originally planned to use the existing shut off handle as a backup, but I could not find a good way to route and mount it that would work with the new engine’s emergency shutoff lever. I decided to just remove the old handle and cable.
Throttle
The throttle setup on the new engine is very similar to the old engine, so the existing lever worked as-is.
Shifter
For the shifter, there were two options:
- Eliminate the existing controls and convert to a single-lever control that handled both throttle and shift.
- Reverse the direction of the shifter.
I did not like the aesthetics or the accessibility of the single handle. It would leave holes in the existing pedestal, and the only places to mount it would require either reaching around the wheel or bending to ankle level. Also, I am very used to the two-lever controls, so I decided to go with option #2.
The transmission came with a bracket that, along with changing the angle of the lever on the transmission, allowed the direction to be changed. The problem was that the cable could not be routed to the bracket and still fit within the space. Also, there was not clearance for the lever to change to this orientation.
The only solution left was to build a bracket and crank that would reverse the direction. I worked through a succession of drawings and mockups. I started with cardboard to just see the boundaries of what would fit. Then I moved to pressboard to actually try the geometries. As you can see from all the lines on the board, I tried a lot of different setups. I then realized that by tilting it downward, I could fit the pivot mount and the cable bracket on a 2″ strip. With that in mind, I tried it out of pressboard, then steel.
It was not possible to get the geometry exactly right and still fit in the space, but once I had it as close as possible, I worked up a design to keep it as simple as possible.
I needed it to be very rigid, since it was so long. With that in mind, I started with a piece of C-channel steel. Then I added some filler blocks, a crank and finally a mount for the cable. Luckily, I have a neighbor who has a metal workshop in his garage, so he helped fabricate and weld the parts.
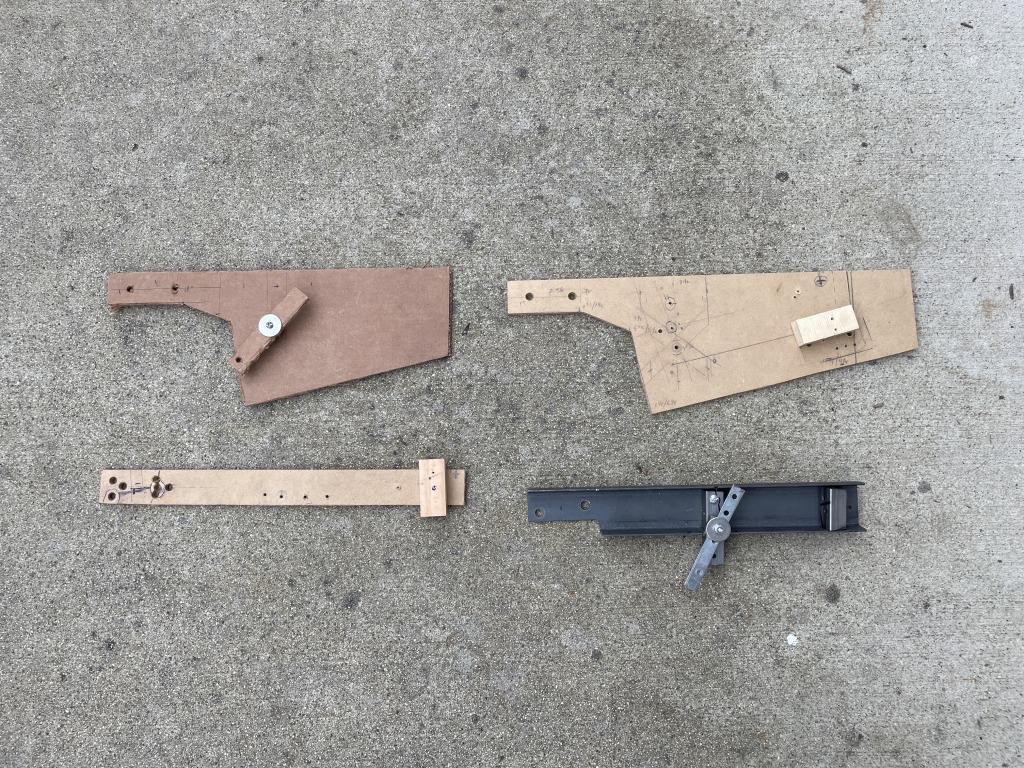
Progression of mockups
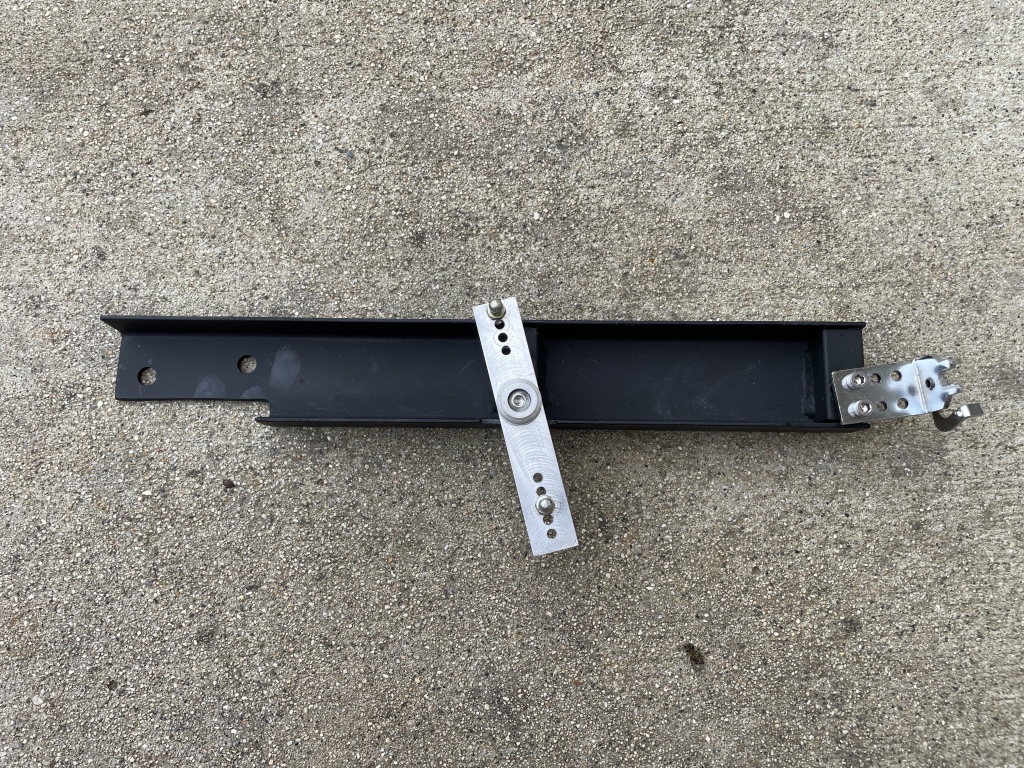
Final bracket

Side view of crank
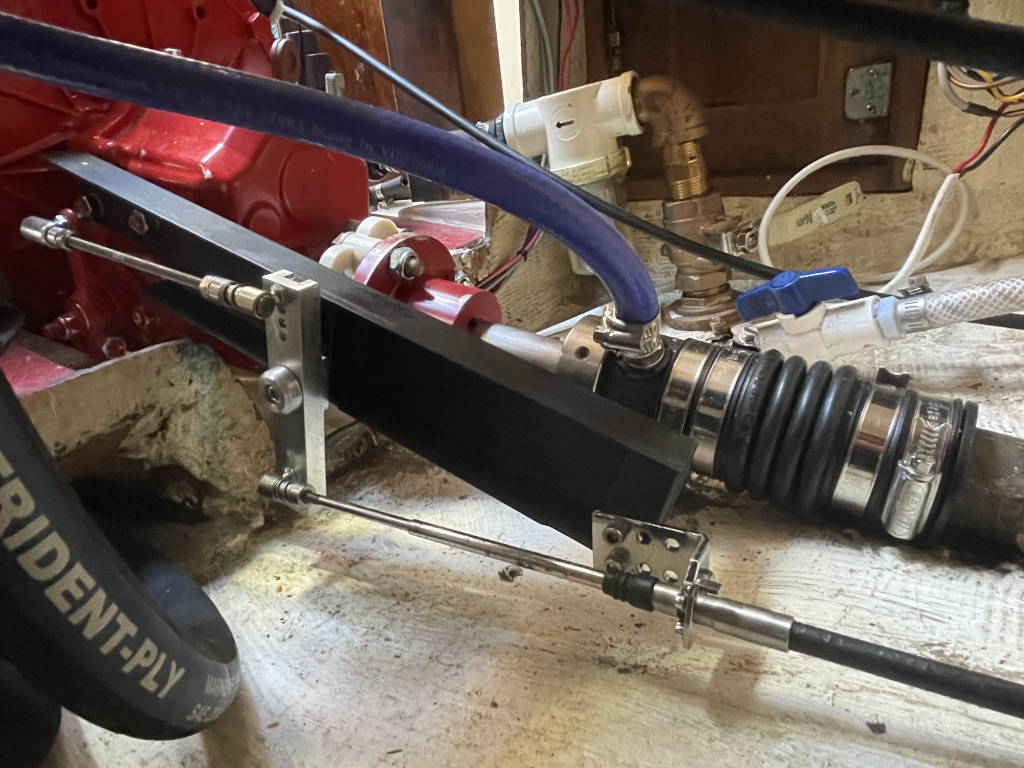
Here is the final backet in place…


