Intro
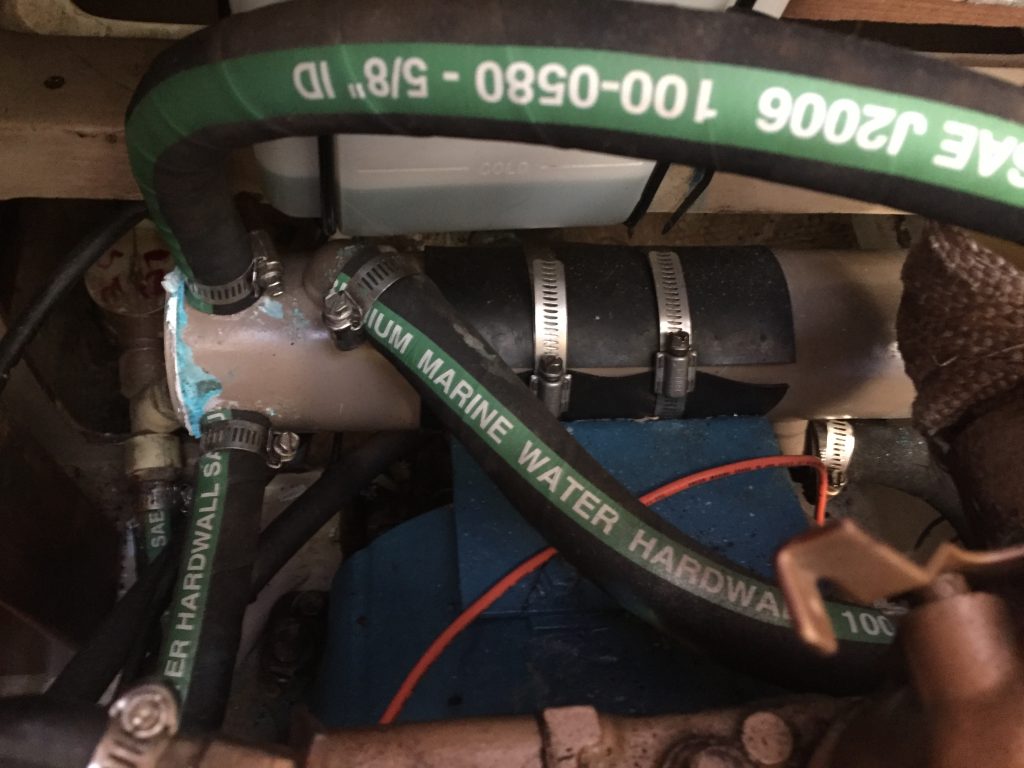
Our old heat exchanger was crusted and corroded at both ends and around the zinc fitting.
Since it had been repaired once before already, I decided it was time to replace it. The raw water pump was leaking as well, so I chose to replace it at the same time, since I would have the hoses off and the coolant drained already.
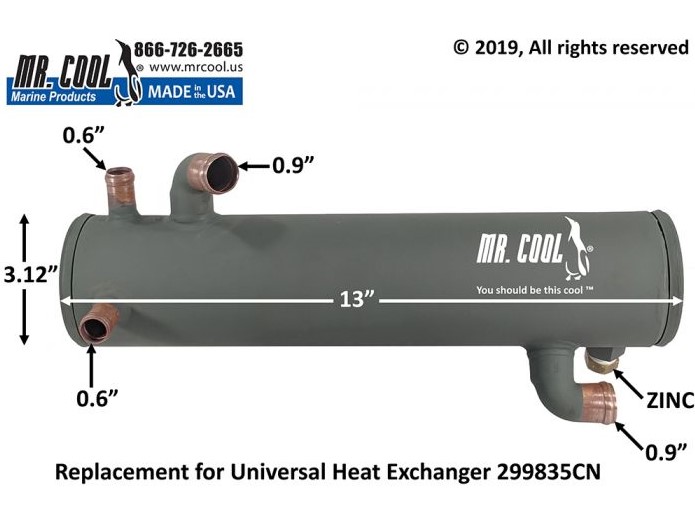
The part from Universal (#299835) is very expensive, so I sourced an after-market replacement from Mr. Cool at a much lower cost. They were easy to work with and shipped the same day.
In preparation for removing the old exchanger, I tried to drain as much of the coolant as possible. Turns out I was not very successfull, and I ended up with old coolant everywhere when I started removing the hoses. Cleaning that up was the hardest part of the project.
Once the hoses were off, it was just a matter of removing the large hoseclamps that hold the exchanger in place and wrestling it out. The overflow tank was kind of in the way, so I unhooked it and moved it to give me better access. The old exchanger had corroded onto the mount, but a little pry with a screwdriver popped it loose.
Putting the new one in was easy now that everything was open. I reused the two pieces of rubber sheet that was on the old one. It looked like it might protect it from the dissimilar metals around it (mount and hose clamps), and I figured it couldn’t hurt.
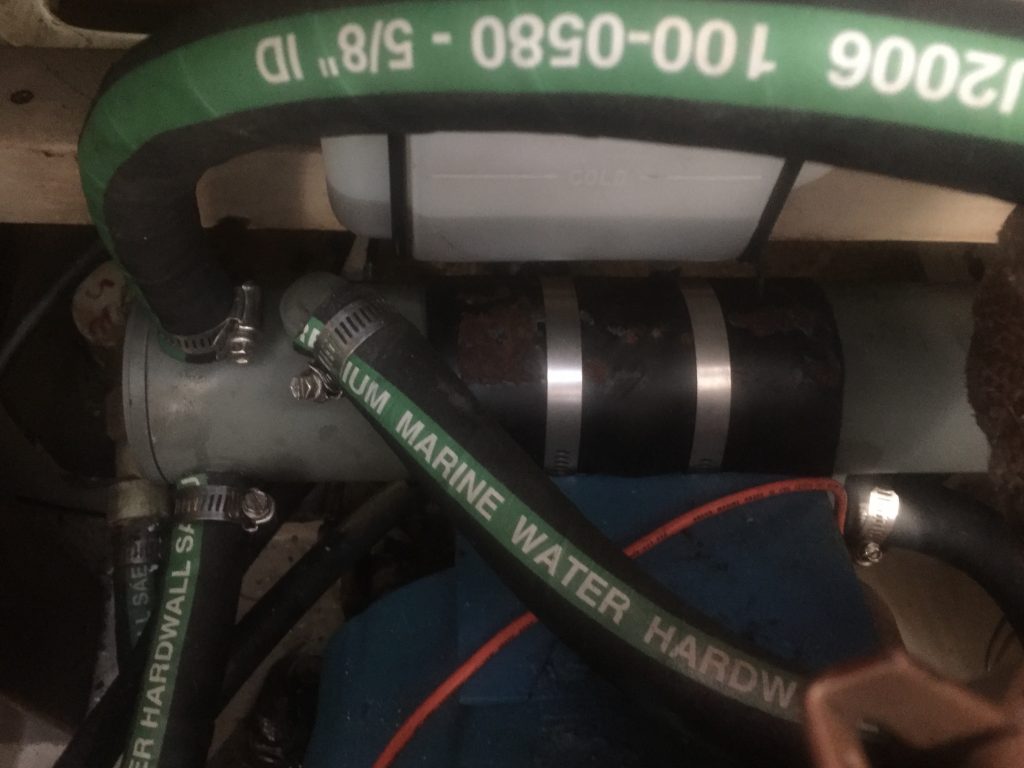
Once all the hoses were reconnected, I refilled the coolant to about 1″ below the cap. I could hear air working its way out of the system, so I waited until it stopped, then topped up the coolant.
At this point, I replaced the raw water pump before continuing. Once that was done, I started up the engine and checked for good water flow at the exhaust. Convinced that I was OK there, I went below to check out the rest of the system.
First I made sure there were no leaks around the hoses at the heat exchanger. Then I checked the fluid level and was happy to see that it was stable. I left the cap off during the tests so I could continue to monitor it.
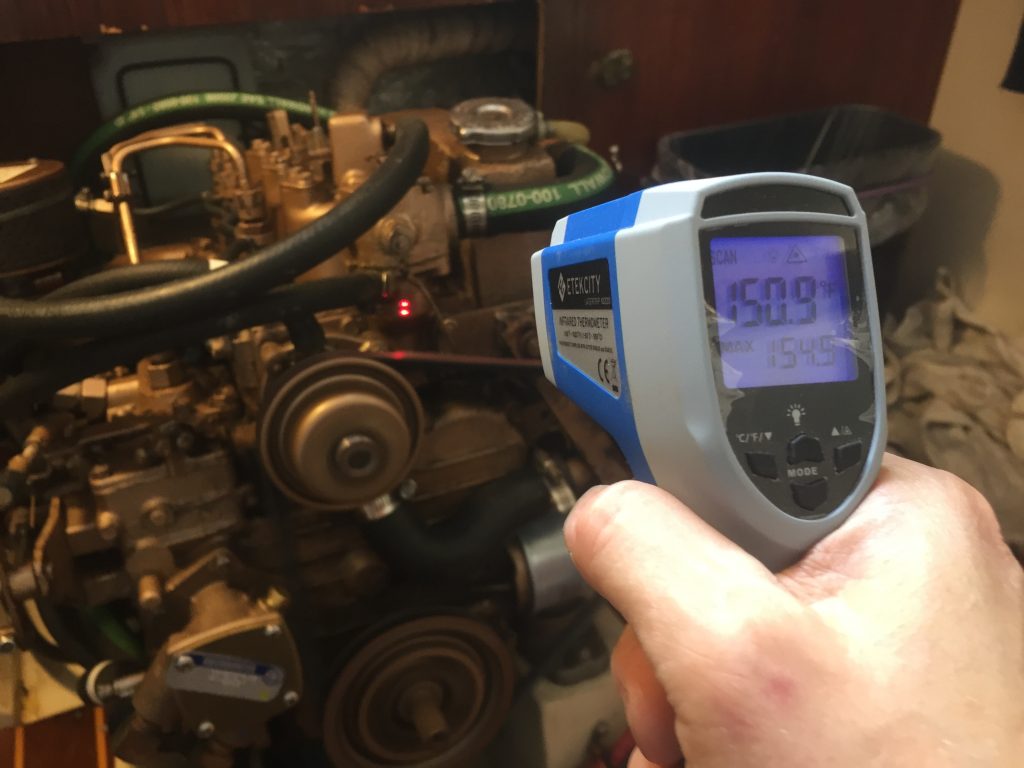
Then I used the temperature gun to check the temp at the base of the thermostat. It stayed around 130, so I put the transmission in gear and ran it up to about 2000 RPMs. I watched with much anxiety as the temp climbed, but when it reached about 160, it dropped about 20 degrees as the thermostat kicked in. I let it run that way for several minutes, and never saw it get above about 170, so I figured I was good.
Update May 2023
While doing the annual engine maintenance, I noticed a lot of salt crystals around the end caps of the new heat exchanger. After talking to the company that made it, I learned that it should be cleaned and serviced every couple of years. Since I wasn’t sure how bad it was, or how long it would take me to get it serviced, I decided to buy a new one. That would let me get the boat back up and running quickly, and I could take my time dealing with the existing one. Then I would have a spare to swap in next time. I also bought two new end caps and gaskets for the existing one.
This time I was much more successful draining the coolant. I attached a hand pump to the draincock on the engine block, near the dipstick. I opened the cap on the reservoir, and used the pump to remove the fluid. For the raw water, I just drained it via the zinc fitting.
Removal was pretty easy, as was installing the new one. I refilled the coolant via the manifold cap, and started it up. No leaks, and as the fluid level dropped while it was pulled into the exchanger, I added more until it stabilized. Unfortunately, the temperature kept climbing past 160, and eventually started to overheat. I tried all the tricks for “burping” the system, but since I did not remove any fluid from the water heater loop, there should not have been any air pockets. In any case, nothing worked, so I decided to remove the thermostat and make sure there was water flowing through the system.
This is where things went sideways. See the article on the thermostat housing for more details.


