Background
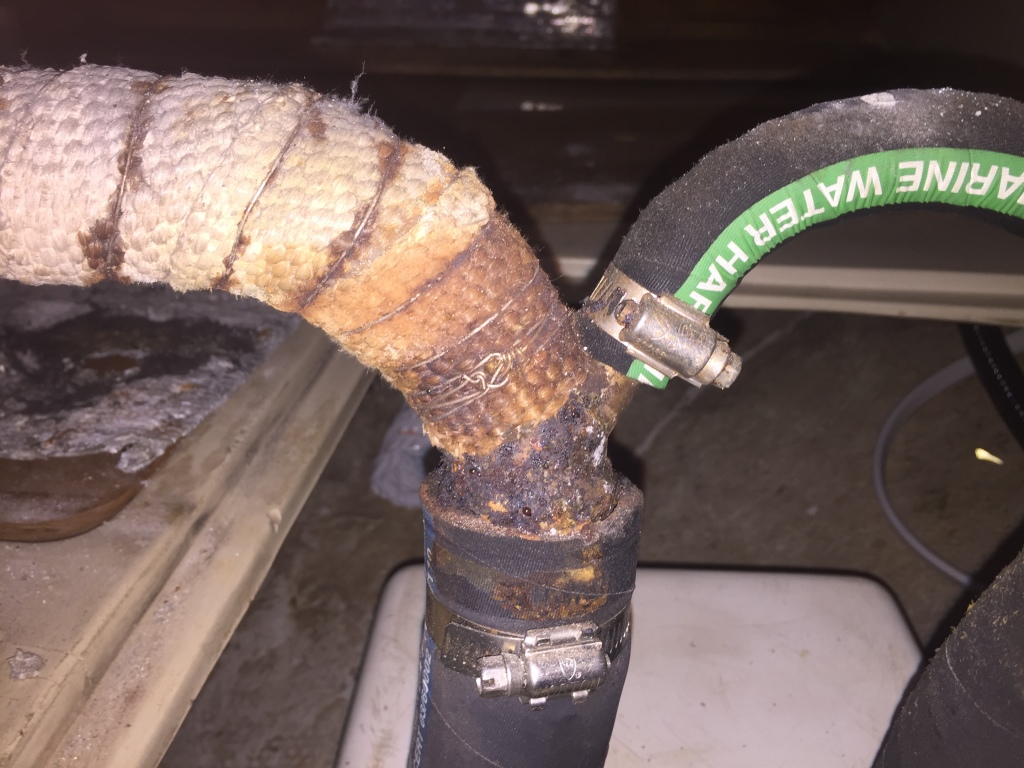
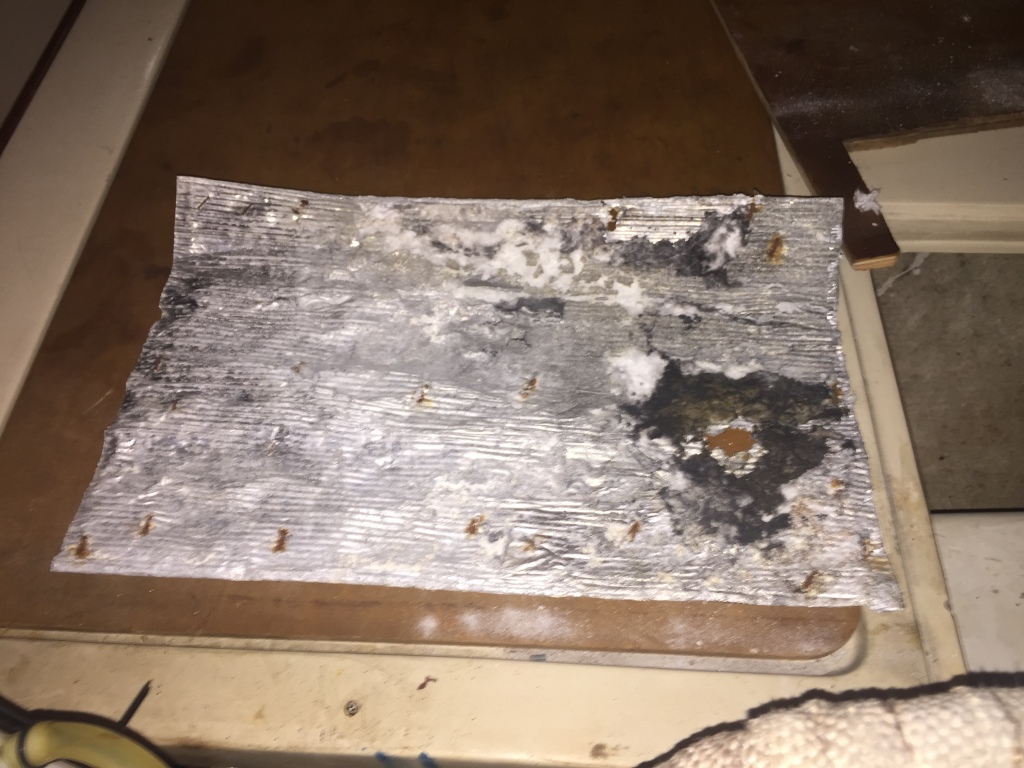
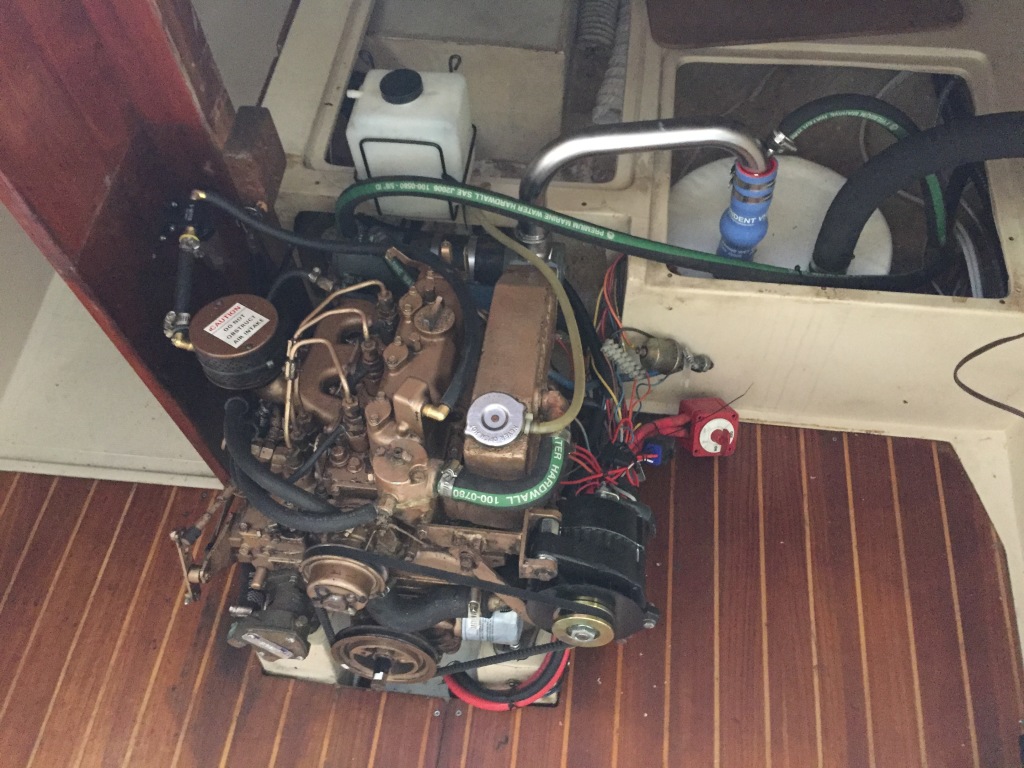
During our survey, the inspector pointed out evidence of past leaking around the mixing elbow on the exhaust riser. We also noted that the elbow was badly rusted and that the heat shield had been burned through from improper insulation.
That set us up for a catastrophic event that I wanted to avoid. In fact, I had just heard from a few other people with 1980’s vintage C36s that had had issues, and our friends a few slips down just had their mixing elbow let loose and make a horrible mess of their aft cabin.
This project had been on my list since we bought the boat, but it was now past time to get it done, since we were about to head out on our 2 week trip up the coast to Catalina Island.
Parts
At first, I was just going to replace the riser, but I did a little more digging around as I was trying to figure out parts, and realized that the muffler inlet had been cracked and repaired at some point in the past. Since I was going to have all the access panels out and would be disconnecting the hoses anyway, it seemed like a good idea to replace the muffler, add a hump hose to prevent future cracking, and to replace the exhaust hose as well.
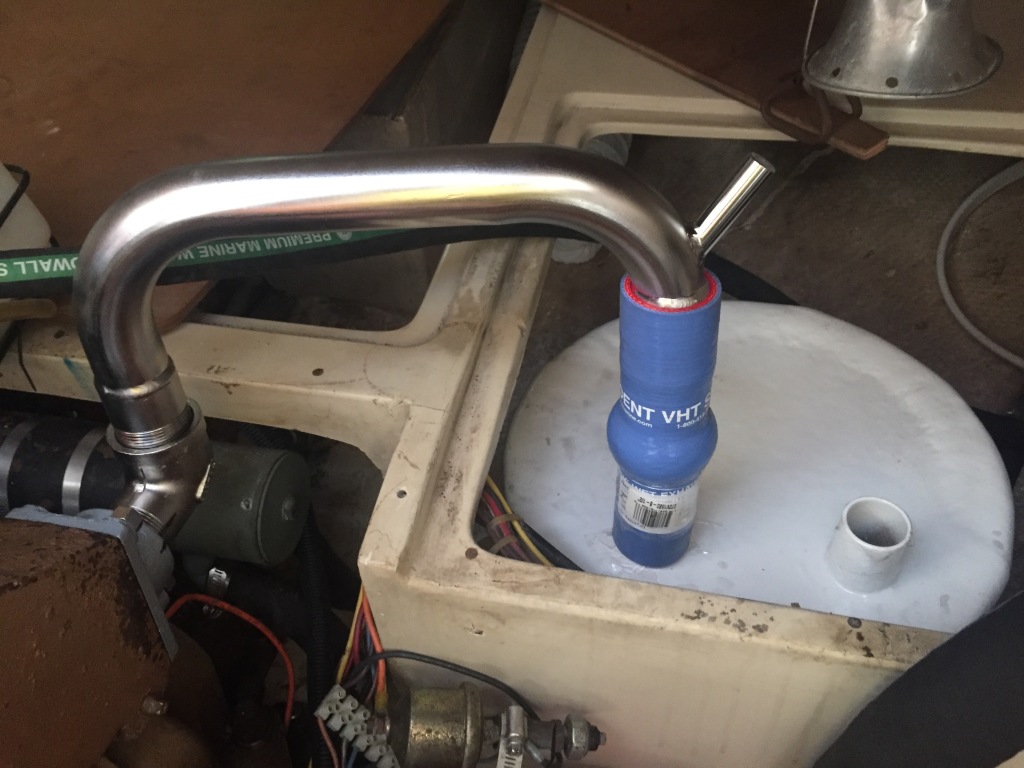
I went back and forth on whether to use stainless steel or black pipe for the riser. Both camps make good arguments. In the end, I decided to go with a pre-made stainless steel one that I knew would fit. With our trip coming up, I did not want to add the risk of getting a custom one to fit right.
I sourced the riser and associated hardware from Catalina Direct. I also tried to buy the replacement muffler from them, but it was no longer available. They had a newer kind that was supposed to be stronger, so I ordered it, along with a hump hose.
I got the hose from Defender. They always have great prices, and had what I needed. I also ordered all new hose clamps from them.
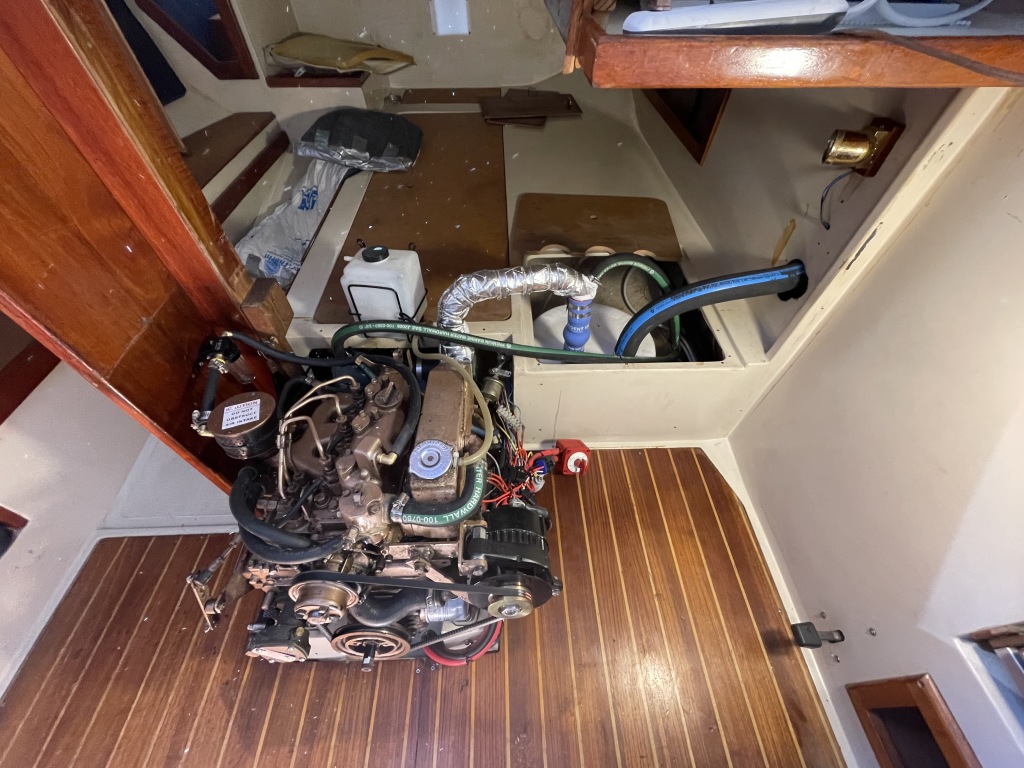
Access
A big part of this job is getting access to the exhaust riser and muffler. Thankfully, a few others have posted good instructions for removing the wooden panel between the galley and the aft cabin. I had to drill out several plugs that covered screws in the galley, but once those were out, it wasn’t too bad to remove it all. Unfortunately, while removing the panel, I broke the plastic sliding door, so I had to replace it. That’s a story for another time.
Drain Coolant
Thankfully, other articles I had read mentioned that you must drain the coolant from the engine before you remove the exhaust riser. If you don’t, it will pour all over the place when you remove the exhaust riser. Since you only need to remove the coolant that is in the manifold portion, I chose to use a large syringe/tube to suck it out from the filler hole on the top of the manifold. I was able to get the tube down into the area next to the exhaust flange and get almost all of it out.
Removal
I have learned the hard way, that any bolt that has been in place since the boat was built will be seized. Now for any project requires removing bolts, I assume I will have to cut them off. In this case I was most worried about the nuts and studs that attach the riser flange to the exhaust manifold. I started a couple of weeks ahead of time and sprayed them with PB Blaster several times. I was also pretty sure the flange was seized to the riser, so I bought a new flange, studs and nuts from Catalina Direct.
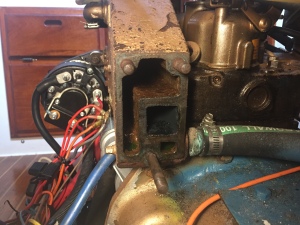
It turns out I was right about the flange, but I got lucky on the nuts. They came off pretty easily, and I was able to clean up the studs and did not have to remove them. I also cleaned up the exhaust manifold where the gasket goes, so I could get a good seal with the new gasket.
When the old flange came off, there was still some coolant that drained out. I had anticipated this, and had some rags down to catch it, but it was a bit more than I had expected, and it still made a mess.
With all the hoses detached, it was pretty easy to remove the old muffler. Once it was out, I cleaned up the whole area, since I would never have this much access again.
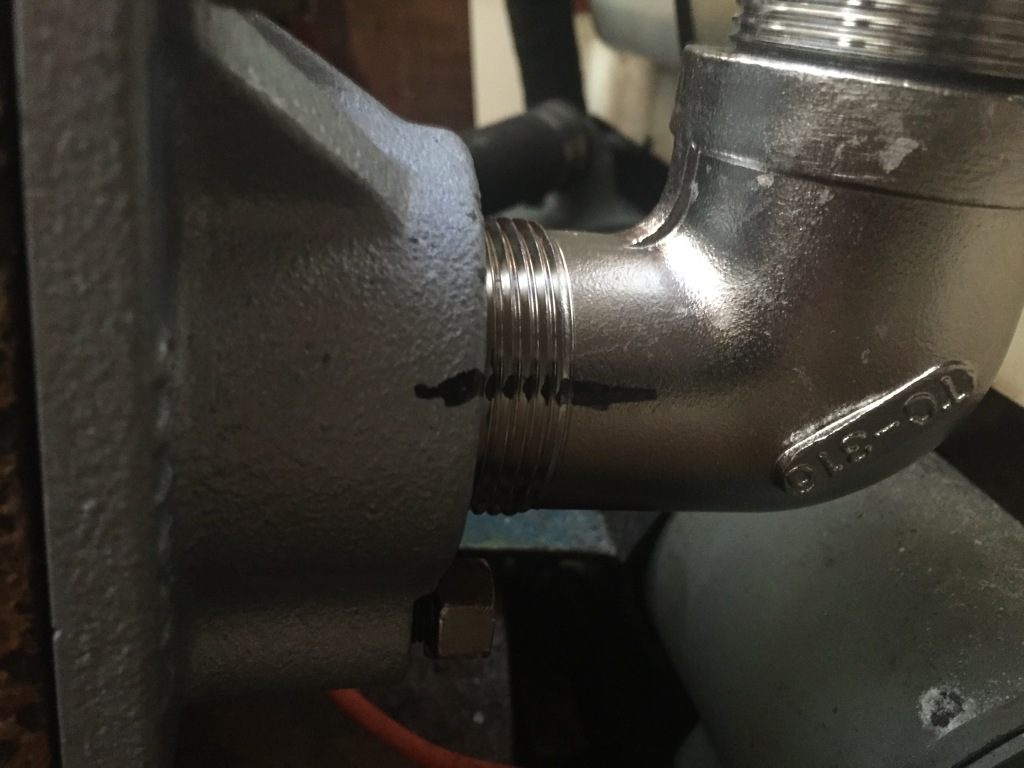
Test fit
The next chore was to test fit the riser, hump hose, and muffler. The instruction for the riser say to be very careful with the stainless fittings. If not properly lubed with compound or if over tightened, the fittings can easily seize. With this in mind, I barely screwed the elbow and flange onto the riser, and loose-fitted the hump hose. I then set in the muffler and roughly lined everything up. With very gentle turning of the fittings, I got everything aligned. I then marked each fitting, using a marker to put a line across the thread on both sides. That way, I could recreate the exact alignment later. I also marked the placement of the new muffler mounting holes, then removed everything again.
Install riser/muffler
Mounting the muffler turned out to be pretty easy. The new holes were different from the old one, but that was OK, because they still lined up with the wooden mount, so it was just a matter of making new pilot holes and then screwing it down.
Back in the shop, I carefully put the supplied pipe compound on the elbow fittings and tightened everything up so the marks lined up. You don’t want to put too much compound, or it will smoke. Also, there is a careful balancing act when deciding if you can go one more turn while assembling the fittings. In the end, I erred on the side of not going too far. They seemed pretty snug, and I didn’t think they would go one more turn. I just hoped it was enough to prevent leaks.
With the riser assembled, I attached the hump hose to it, then to the muffler. After putting the gasket in place, I then rotated the riser until the flange could slip over the studs in the manifold. Then it was just a matter of snugging down each nut a little at a time, to get an even pressure on the gasket.
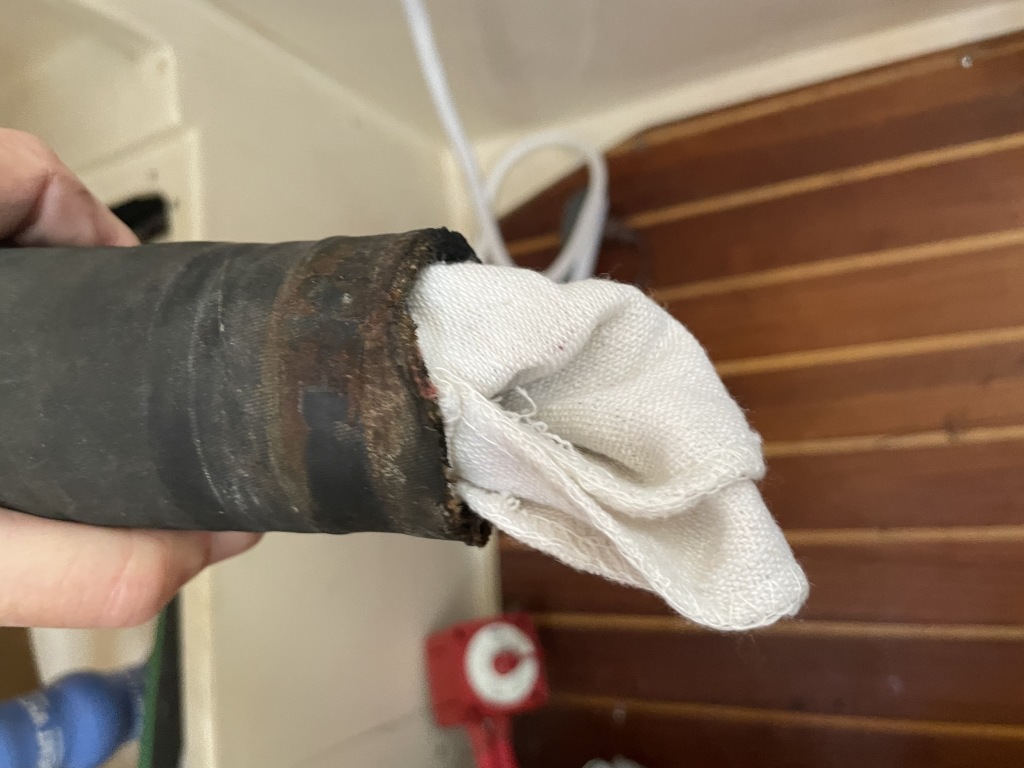
Replace hose
The old exhaust hose from the muffler to the transom wasn’t in too bad of shape, but I figured it would be easier to replace now while I had everything open. Getting the old one out without spilling stinky water everywhere was the hardest part. I stuffed a rag into the end of the hose, and as much as possible, I lifted any low spots such that they would drain to the rear. Then it was just a matter of pulling it out.
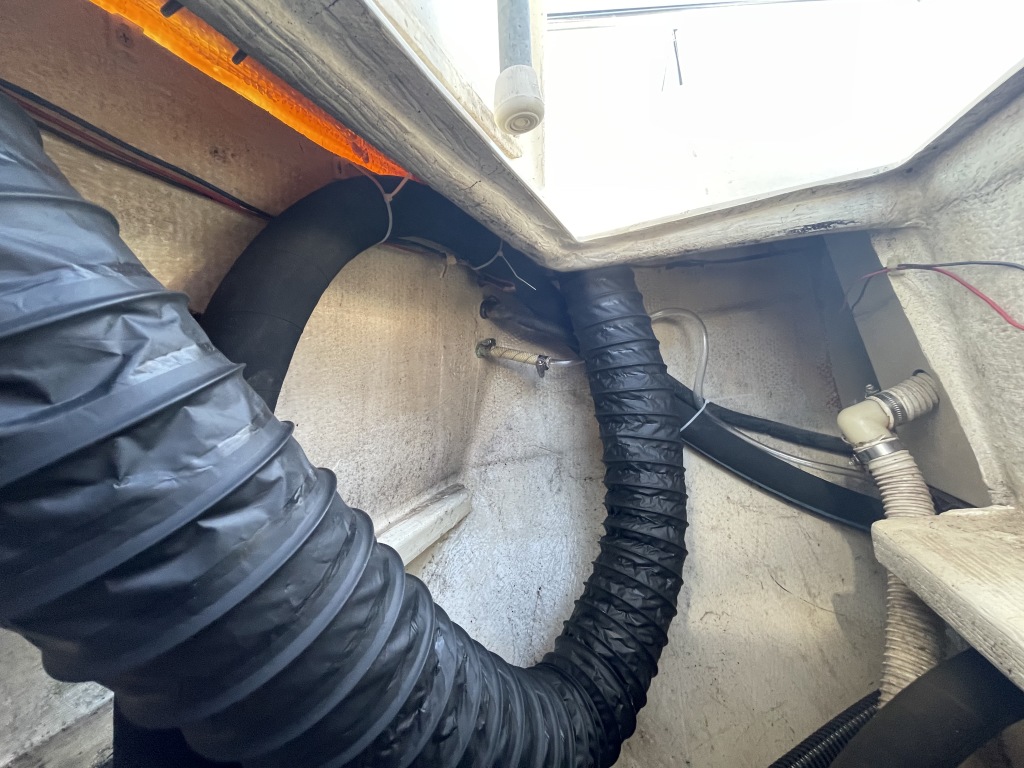
I didn’t like the routing on the old hose, so I changed it up a bit to get a cleaner run. I also ran it up higher under the aft combing to prevent any issues with following seas. I used heavy-duty zip ties to secure it up there, but it probably wasn’t necessary, since the stiffness of the hose pretty much forced it up there based on the length I cut it.
Double hose clamps on each hose connection completed the installation.
Refill and Test
Before starting the engine, I had to refill the coolant. Since I had not removed any from the engine itself or the hoses that go to the water heater, I shouldn’t have to do any burping. It was just a matter of topping off the coolant.
Next I started the engine. I figured it would be OK for a minute or so without water flow, so I immediately went below to check for any leaks. After a quick look, I went back up to make sure I got good water flow out the exhaust. I then went back down and did a more thorough inspection. Everything looked good, and I had no leaks. Yay!!
Next I ran it up to speed and checked that the temperature remained in the proper range. After a few minutes, I could tell the thermostat kicked in, and the temp held steady. No need to burp the coolant.
Wrap up
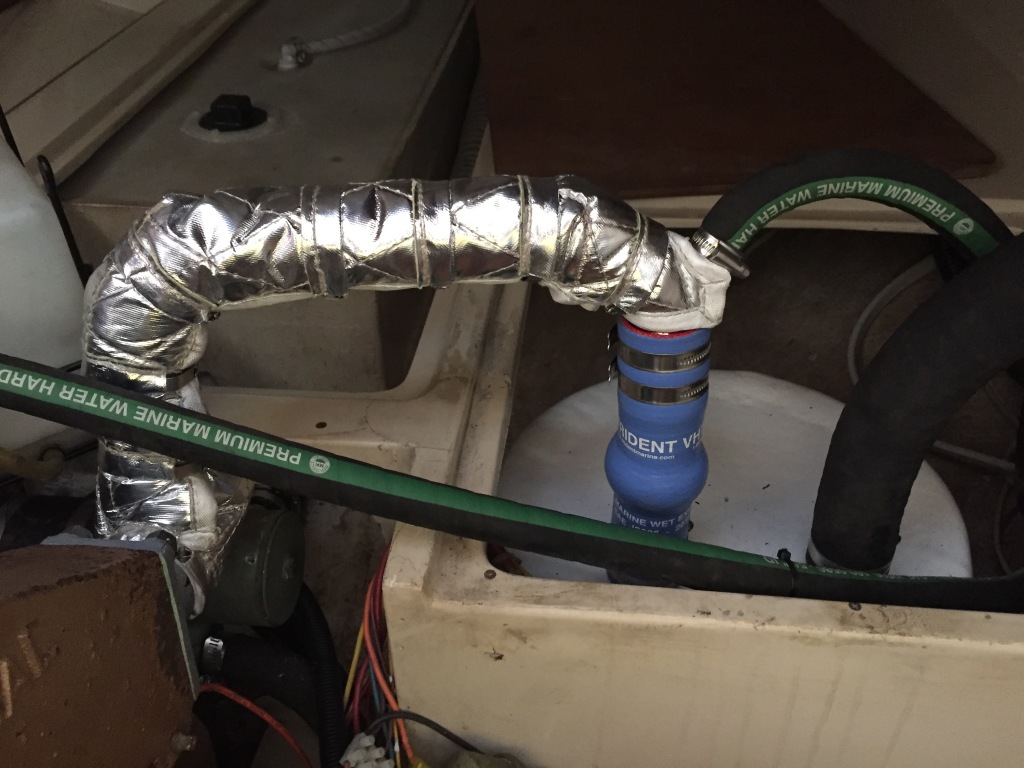
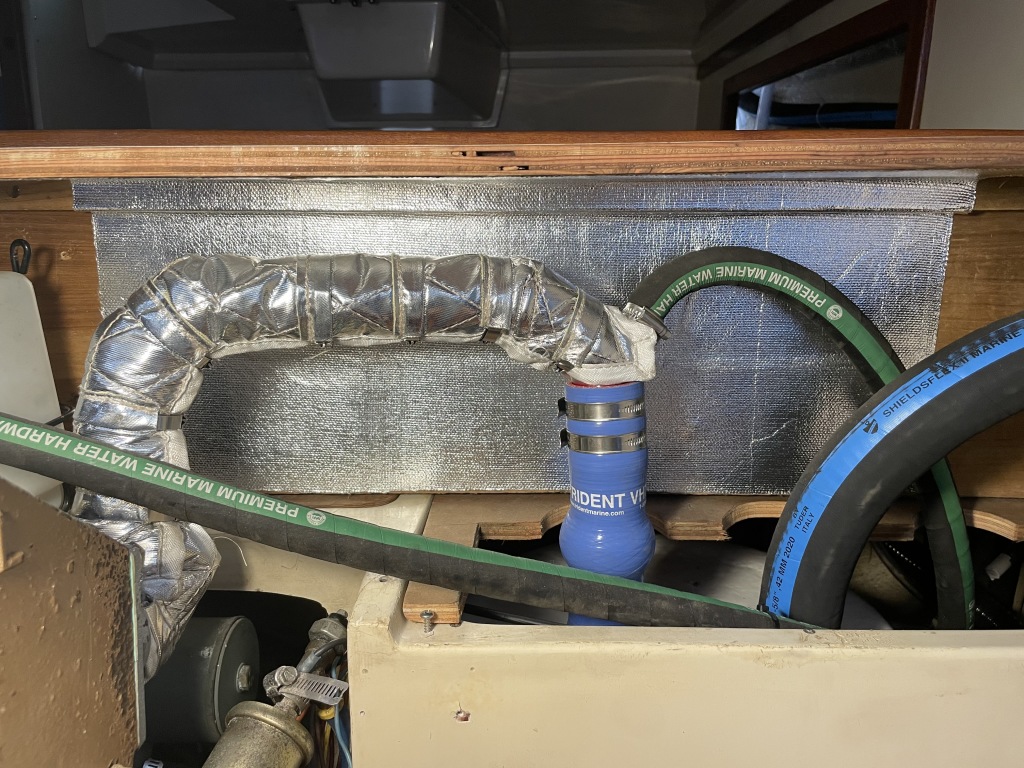
After letting it cool down, I installed the insulation on the riser, and I put some new heat shielding on the wood panels closest to the riser.
Then it was a matter of reversing the process to put all of the panels back in place. I decided not to replace the screw cover plugs. They are down at knee level, and don’t really show that much, and leaving them out will make it much easier to remove those panels later if needed.
Conclusion
This job turned out to be easier than I expected. Reading the reports from other who had done the job was key to knowing what to expect. And having all the parts on hand ahead of time, meant I could do it all in one weekend.
This is a job that everyone with an older boat will have to do, and it is much easier and cleaner to do it before it breaks. The peace of mind on our trip was priceless.


